The old Port Kembla Exchange is reputed to be the last surviving intact step-by-step exchange in mainland Australia.
Its preservation appears to be purely a matter of chance and circumstances. An entirely new exchange was built next door to house the replacement technologies, with the result that the rackspace in the old exchange wasn't needed, and when the legacy infrastructure in the old exchange was decommissioned, Telecom just switched off the lights and locked the doors.
It appears that a small amount of equipment was salvaged - for example power equipment, which may have had a larger proportion of salvageable parts, but by-and-large the exchange appears to be much as it would have been when in use.
The exchange building appears to have been built in the late 1940s, and materials in the exchange seems to indicate that it was decommissioned in the late 1980s.
Robert Huisman has captured some excellent black-and-white images of the exchange equipment
here.
The exchange is mentioned on the Commonwealth Heritage List, and the details of the listing can be seen
here. The listing status is shown as "Ineligible Place", which appears to happen when a Commonwealth place ceases to be in Commonwealth ownership or occupation during the assessment process.
 |
| Detail of a block on the Main Distribution Frame. |
 |
| Detail from the Main Distribution Frame. |
 |
| Spares jars on a shelf in the Super Tech's office. Apparently they were considered valuable or important enough to require the Super Tech's oversight. |
 |
| Spare jars in the Super Tech's office. |
 |
| The sign on the Super Tech's office door. |
 |
| Fault codes on the test desk. |
 |
| Test desk in the MDF room. |
 |
| Detail from the test desk. |
 |
| The Main Distribution Frame. |
 |
| Racks in the equipment room, with step-by-step banks in the foreground, and crossbar equipment further down. |
 |
| A step-by-step bank, with fuses on the top left. |
 |
| Detail of the fuses. The fusewire holders were spring-loaded, with a switch underneath, so that if a fuse blew, the spring-loaded switch would make contact, and either trigger an alarm or illuminate an alarm-light. |
 |
| Mechanical meters for calculating call charges. |
 |
| Mechanical charge meters. |
 |
| Detail of the call meters. |
 |
| Close-up of a step-by-step bank. |
Paul Blair shared the following reminiscence in relation to working with step-by-step equipment:
30 years ago as an apprentice my first field posting was at Kooyong exchange in Vic, where the Tech officer in charge of me, showed how to, then instructed me to clean 2 suites of banks using a kerosene based fluid and a bank cleaning tool, it took two weeks to complete along with constant wrist and forearm cramps from the side to side cleaning action required to polish the brass contacts to a gleaming lustre.
During those two weeks many maintenance and installation techs, with oddly puzzled looks on their faces, approached and commented on how well I was doing.
Whilst proudly admiring my handiwork of pristine shiny golden banks when completed, the Tech officer who first instructed me to clean the banks approached me with a huge smile on his face and noted what an excellent job I had done, then added the two suites were to be decommissioned and removed from service the following week to make way for two new AXE RSS’s.
Subsequently I declined his, and the other Techs following offers to view the exchange's “golden rivet”.
 |
| Close-up of a step-by-step bank, showing the switches used for taking the equipment out of service for maintenance. |
 |
| Step-by-step equipment - a bank of uniselectors viewed from the front |
 |
Step-by-step uniselectors
|
 |
| Outlet multiples on the back of step-by-step uniselectors. |
 |
| Outlet multiples on the back of step-by-step uniselectors. |
 |
| Signage at the end of an aisle. |
 |
| Step-by-step banks, showing the plastic inserts used to protect them when they were not in service - presumably to prevent the entry of dust. |
 |
| The machine selector on the ringers, to swap between the duty ringer and the back-up. |
 |
| Fuses on the ringers. |
 |
| Fuses on the ringers. |
 |
| Voltage meter on the ringers. |
 |
| Switches on the ringers. |
 |
| The business-end of a ringer, showing the motor at the right, which drove a cam towards the top, which oscillated the various electrical contacts at the left. |
 |
| Detail from the ringers. |
 |
| Close-up of fuses on the ringers, showing the spring-loaded switches at the bottom, to trigger alarms when a fuse blew. |
 |
| An aisle of crossbar equipment. |
 |
| Baretter lamps in PABX ringer circuits as current limiters An overload would cause the lamp to glow dull red, a full short something much brighter. |
 |
| Labelling on the PABX alarm lights. |
 |
| Labelling on the Alarm Equipment Rack |
 |
| "Fiddle strings" - it appears in the US they are called "Banjo Strings"- soldered jumpers. |
 |
| Power equipment. |
 |
| Crossbar equipment, showing the relays at the top and right-hand edge that tilt the "cross bar" to form connections. |
 |
| Signage at the end of an aisle. |
 |
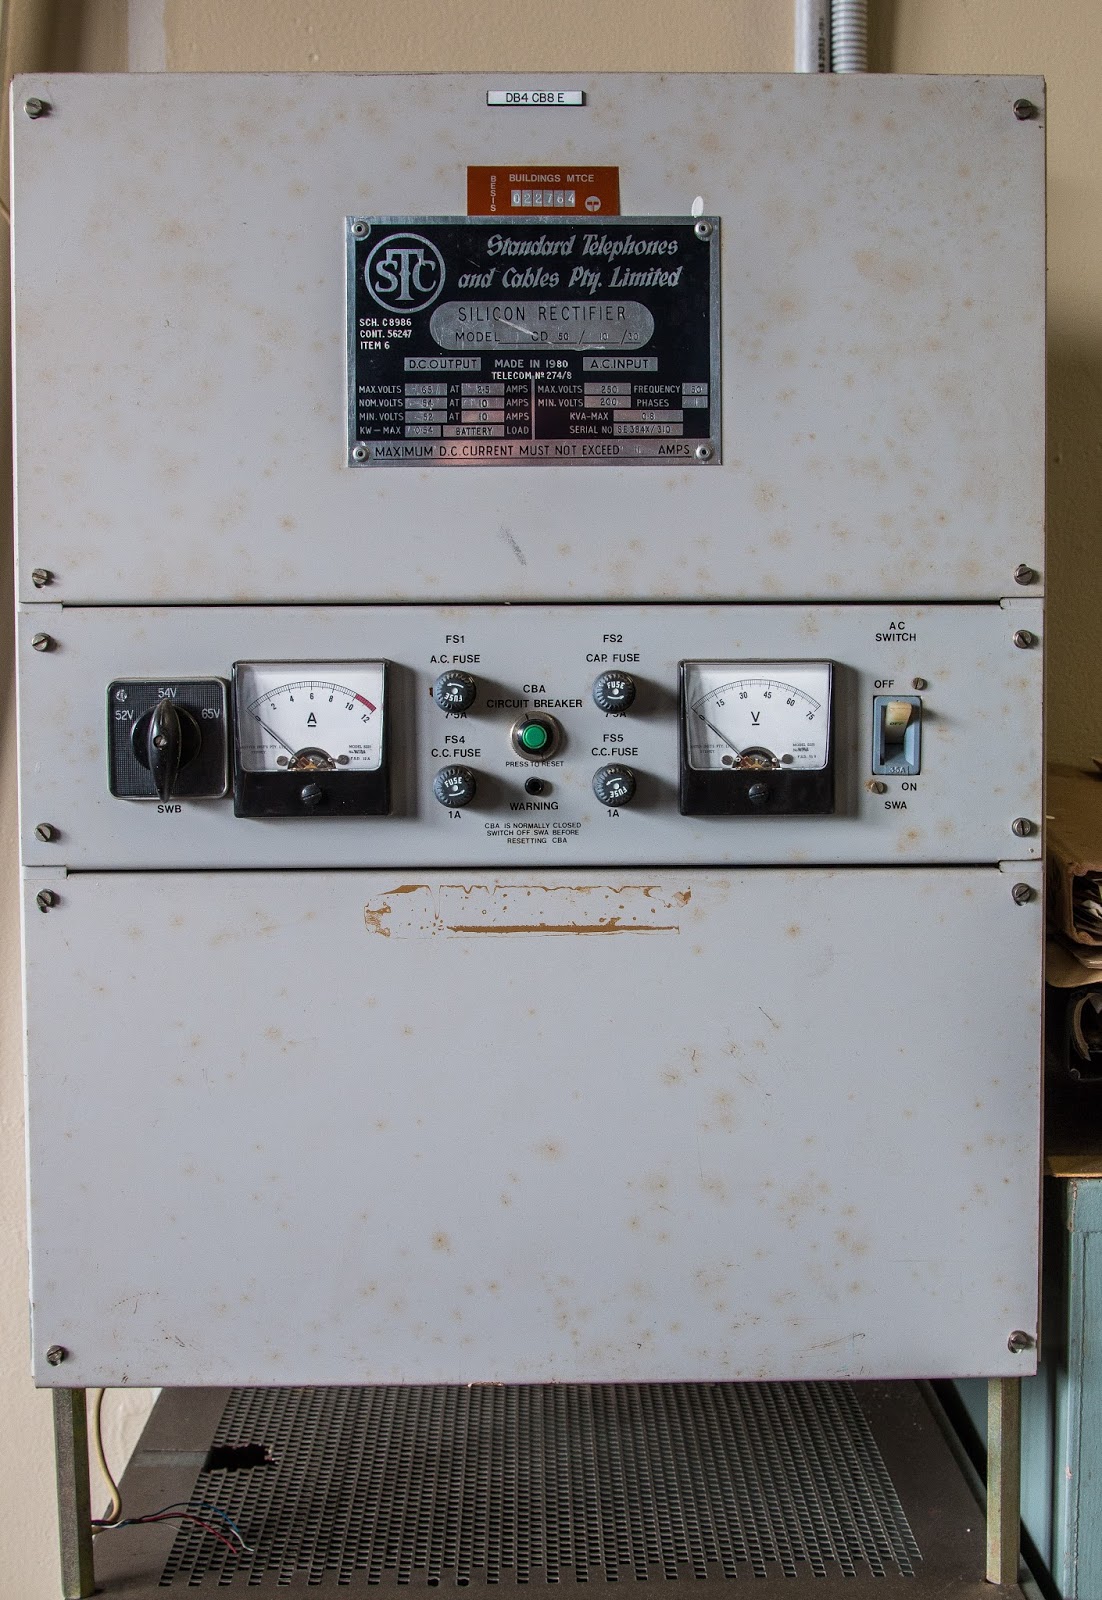
| Manufacturer's plate on power equipment. |
 |
| 50V positive- supply rectifier - ie negative earth. Used mainly for metering functions rather than general powering of equipment, so a relatively low current draw (10 Amps). |
 |
| The maintenance room, showing a table full of step-by-step equipment, presumably left where it was taken for cleaning and maintenance. |
 |
| Air pressurisation equipment downstairs in the exchange. The lines were pressurised to assist in identifying a cable-cut. |
 |
| Pressure meter. |
 |
| Pressure meter. |
 |
| A discarded text-book - "Telephony 1" - note the Commonwealth coat of arms. |
 |
| Old cable runs connecting the MDF to the equipment room - note how perfectly straight and square they are. In the days of bulky step-by-step equipment these sorts of cable runs were meticulously planned and aligned. These days, cables are basically thrown into a cable-tray going roughly the right direction. |
Acknowledgments:
Many thanks to Brian Mullins and Geoff Gallaty of the Telstra Museum, Bankstown for flagging the unique value of the old Port Kembla Exchange, arranging access, and generously giving up their time to explain the operation of the equipment. Any errors in the materials are of course solely my own!
A similar photo-blog in relation to the Sydney-Melbourne Co-axial Cable can be found here: http://coaxrepeaterhuts.blogspot.com/